Showing posts with label dyeing. Show all posts

Thursday, July 13, 2017

Solar Dyeing


Dear Mom,
My experiments with solar dyeing have been most successful and satisfying! Armed with hope and NO expectations, I decided that the fiber in the box and the dye materials sitting on the shelf were more of a waste and failure than any failed dye experiment would be. Mine were not exacting scientific experiements- they were more of the WhatTheHeckLet'sSeeWhatHappens variety.
I pre-mordanted my fiber with alum, and except for the last experiment, with Logwood, I did not weigh and measure the alum/fiber ratio.

I dyed in approximate 2 ounce batches because that is what I could easily fit into my 1 gallon sun tea and pickle jars. I placed the fiber into mesh laundry bags before I started and they stayed in the bags until the fiber was dry at the end.

First, I used a sachet of osage orange saw dust. I let the saw dust steep to color the water and then added the wet fiber. I left the sachet in the jar and put the jar in a sunny spot on the back patio. When the fiber was nice and bright, I gave it a good rinse, spun out the excess water and hung the bag of fiber up to dry. I repeated this 4 more times until the resulting fiber was pretty pale. I ended up with about 10 ounces dyed a nice gradient of yellows from sunshiny bright to buttery.

Okay! So that worked! Next up- Madder Root. I dumped the package of chopped up madder root into my rinsed out jar, filled the jar with water and let it sit in the sunshine. The water very quickly turned a beet juice color. In went the wet fiber. And out came this:
This color is ME. 
I was able to get 2 more batches out of that same jar. Again, each successive batch was slightly lighter than the last, but each is beautiful. I couldn't wait to start spinning.


You can see the variation in the dye batches in this next photo. 


When I've used heat and crockpots to dye fiber in the past, I found the fiber to be slightly felt-ish. Not so with this solar powered method! This spun up without any hassles. The only thing I would do differently if I were to do this again, would be to put the madder roots into a small mesh bag rather than let them float around in the jar with the fiber. 

On to Logwood. I used up the last of my merino/mohair roving on this. Again, I wasn't sure what to expect. Research showed me I could expect lavender to gray. Research also told me that I would want to use a higher alum to fiber ratio, so this time I weighed my fiber and measured 20% alum as pre-mordant. 

The Logwood chips I had were the size of cinnamon sticks. Having learned from the loose Madder root, I placed the logwood chips into a small mesh bag in the jar. The other minor departure from the first 2 experiments was to pour boiling water into the jars. I let the logwood steep for a day before adding the fiber, and divided the juice into 2 jars, topped them off with hose water and added the fiber. The water was a fuchsia pink/purple.


The last batch was the palest of pink. Lovely. I can hardly wait to spin it!

I have some weld on the shelf, and it is the last of my natural dyestuff. I have a healthy stash of white merino/angora roving that I could use, but that roving might be too precious to experiment with.  And just this afternoon I learned that blackberries give a very nice purple dye. IF I tire of eating blackberries from my garden.

I would say my experiments were successful. I think I'll get rid of the various dye pots and crockpots on my dye shelf and continue solar dyeing my fiber in the future. Until then, I have lots of exciting spinning projects!

Love,
Kim

Tuesday, June 27, 2017

These have not been lazy days

Dear Mom,

This Song is mocking me. These have been anything but lazy. A few days of hot and hazy and a little bit crazy.  I keep hoping to settle into a soothing routine, but it hasn't happened yet. The last few days have been perfect - like northern Michigan weather- and I am spending as much of it as I can on the porch.

I've been making up for last summer's convalescence by weeding, planting, mowing and tending the yard, herb garden, tomato plants and perennial garden. I've squeezed as many annuals and perennials into my flower garden as it will hold. I've got zinnias growing with my tomatoes, and a variety of seeds sown amongst the sage, basil, oregano and chives in my herb garden. The bunnies have probably eaten 90% of the seedlings as they emerge, but I remain hopeful of full vases of freshly cut flowers on my table.

We've finally had a persistent and mysterious leak located and repaired, and things were definitely disrupted while that was going on. Just getting stuff temporarily moved out of one room made me think I never want to have to really move. Needless to say, Goodwill got a hefty load and the room is put back together.  While that was going on, I wiped my week clean of appointments to be here. I needed to see with my own eyes that things stayed dry as our contractor doused the area with the hose and I didn't want to miss it.

Things were is such disarray that I didn't feel like I could add to it with a sewing project, but I did weave some dish towels.


I happened to have the book, A Garden to Dye For, from the library, and something I read inspired me to try a "sun tea" dye experiment. I have a variety of purchased plant dye stuff from fiber festivals- osage orange, madder, logwood and weld. The garage was occupied by the contractor's equipment, so using my crockpots was not an option. I also had a 'What Are You Waiting For?' feeling about the full shelf of dye stuff and decided it was more wasteful to have it all sitting there doing nothing than it would be to use it in a failed experiment. I filled a gallon jar with water, plopped the cloth bag of osage orange sawdust into it, and let it steep. In the meantime, I put about 2 oz of roving (70%merino/30%mohair) into a mesh laundry bag and let it soak in a second gallon jar with alum to pre-mordant the fiber. (Mordants help the fiber accept and keep the dye. Also, different mordants can alter the final color of the dye.) Once my osage orange tea was a nice bright color, I added the fiber and let it sit in the sunshine. 
I let the fiber steep for a day or two, took it out and carefully rinsed it with water as close to the temperature of the dye bath as I could manage. The fiber stayed in the mesh bag through the entire process to protect it from too much handling. I did not remove the osage orange tea bag, nor did I dump the dye out of the jar. Part of my experiment was to see how much fiber I could dye with this one batch. 
This is the first batch, rinsed and dried. Beautiful! I ended up dyeing 5 (2 oz) batches in total, and they very gently fade in a gradient of bright to buttery yellow. This process might be slow, but it was easy, used no electricity, and was fun to watch. Best thing: the fiber is not sticking to itself. When I've dyed roving in the crockpot, it seems like it wants to felt. I think the shock of the heat and simmering does that to the loose fiber. I've not had that happen to yarn dyed in the crockpot.  Plus, spinning dyed roving makes a prettier yarn than dyeing already spun yarn, in my opinion. 

I am currently using the same process using Madder.  I'll share the results soon!

Enjoy the sunshine!
Love,
Kim

Monday, July 27, 2015

We should have worn gloves

Dear Mom,
After reading about ice dyeing as an alternative to traditional tie-dyeing tee shirts, I decided it was something that needed to be experimented with, only on wool. I immediately emailed MelissaWhoSpins and we marked our calendars for July 25. Along the way I invited my friend and watercolor teacher, Cindy, to join us.

The theory behind ice dyeing is to cover the to-be-dyed item with ice, sprinkle the dye powder on top, and as the ice melts it carries the dye into the item in a random tie-dye affect. I experimented on both commercially spun yarn and roving. Melissa brought a wool blanket and scarf, too.  We used Kool-Aid and Greener Shades dye powder, and some of the Greener Shades dye stock I had already mixed up and frozen in shot-glass sized plastic cups.


As our fiber soaked in a vinegar water solution, we spread out old sheets all over the side yard. We then plopped our wet fibers into piles and covered them with ice. I think at this point I asked Melissa if she wanted gloves. I believe she said something like "gloves are over-rated" and we plunged right in.


Once the fiber was covered, we then sprinkled the kool-aid and dye powder onto the ice. I used the frozen dye cups on the commercially spun yarn.

commercially spun yarn with dye-cubes
First thing we learned: Aldi's brand of Kool-Aid does not work as well as real Kool-Aid for dyeing.

Next thing we learned, which was very surprising: 66 lbs of ice is not enough ice. We made a quick run to Target for more ice. Total ice consumption= 100+ pounds!

We took a lunch break while the ice melted. When we went to check the progress of things, we started making adjustments. I think I poured some of the vinegar water pre-soak on to the non-dissolving Aldi's drink mix. Cindy had the brilliant idea of rubbing ice cubes across some of the dyed fibers to blend the dyes. BRILLIANT! At this point our hands and nails were pretty much black and blue. Bruised looking. As I write this, my nails look like those of an auto mechanic. 

Once the ice had melted we set the dye by steaming the fiber in crock pots. I did have to do quite a bit of rinsing, too, to remove the excess dye. A quick spin in the washing machine and then out to dry. 


As you can see, the sheets are evidence of some of the wonderful tie-dye results we would have had if we were dyeing shirts. And if you look closely at Cindy's hands, you can see how black her fingers are!

Here are the results of the day:

This is a 70% merino 30% mohair blend. I used Greener Shades powder on ice.  

100% alpaca with combination drink mix and dye cubes, I think.

Merino/mohair blend with dye powder on ice

Commercially spun yarn dyed and "painted" with frozen dye cubes.

Close up of the dye-cubed yarn

These next two photos are of the dyed roving and then after it was spun and ply-ed with some of the same, but un-dyed.
merino/mohair blend, dyed with drink mix

We had fun. And mixed results. I don't know that I will do this again- if I do, it will be with yarn, not roving. Through this process, the roving had to be handled a little more than I would have liked. I am very happy with the results of the frozen dye cube dyed yarn, but I think similar results could be achieved by painting the yarn with dye stock and skipping the melting ice part. Still, it was an adventure and worth trying. 

Love,
Kim

Tuesday, June 2, 2015

How Does My Garden Grow?


Dear Mom,
Can you believe a month has gone by since we planted the cottage flower garden? So far, everything seems to be thriving. I've just lost one english daisy and the delphinium I transplanted has disappeared. I'll make a trip tour favorite local nursery to replace them. I've added some Dame's Rocket transplants from a friend's garden and some sort of sedum ground cover between stepping stones from the same friend's garden.  I need to thin out the marigold seedlings, which will require some hard hearted-ness on my part. I am not sure I can actually do it. I think every single marigold seed germinated! I should probably sprinkle more zinnia seeds throughout some of the bare spots as fillers until the perennials can.
The temporary Olive barrier fence is still in place. I've tripped over it enough times that I am ready to take it down and keep my fingers crossed that she will not trample everything. However, the fence  is now working hard at keeping the peonies from falling into and smothering the cranesbill so it will remain until I invest in a plant support for the peony.


I planted both perennial and biennial varieties of foxglove. It is the biennial foxglove that is blooming now.
This is ice plant- something I'd never heard of before. I fell in love with the charming little daisy-like flowers. The foliage looks like it is a succulent of some sort. The flowers open and close with the sunshine.

English daisy


Daisy and columbine in bloom along the fence border, under the pussy willow. I've planted stock, asters and pinks along the edge.

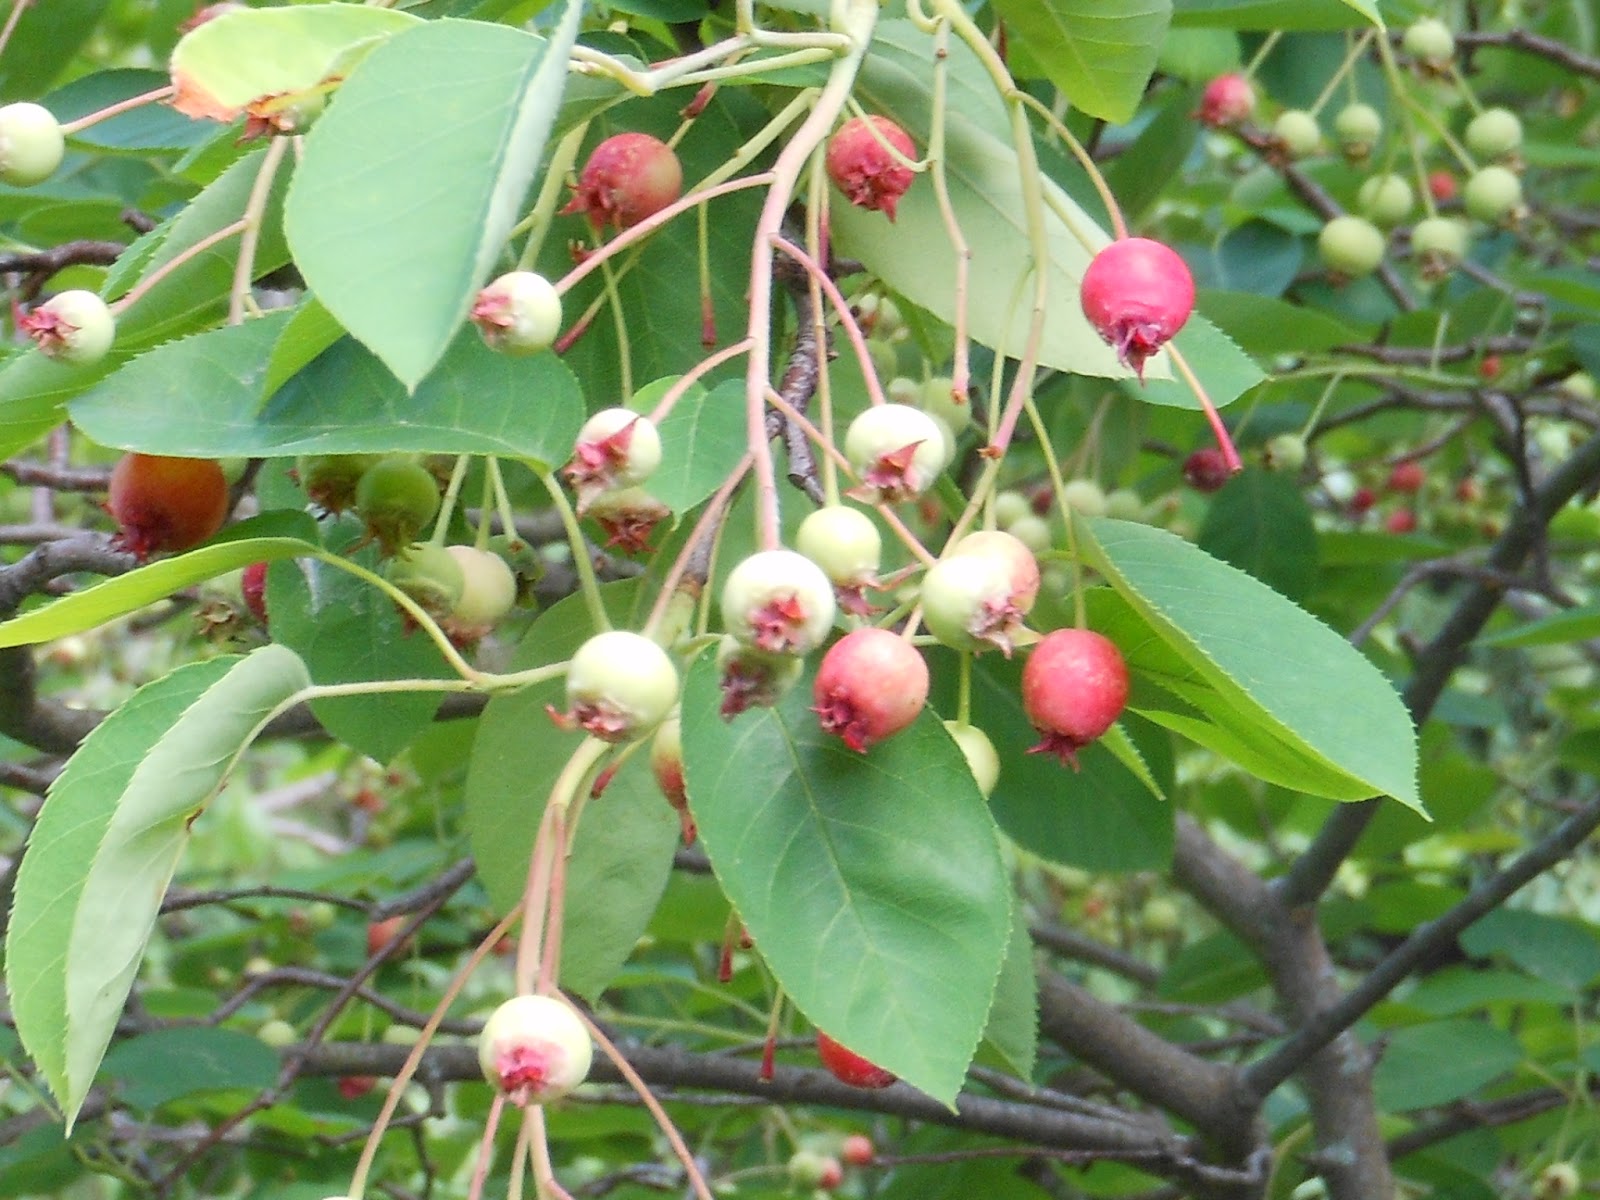
The fruit on the serviceberry trees is ripening. We planted one just outside the screened porch to filter the sun as it sets. I have a somewhat hidden spot to watch the birds eat the fruit. They are quite determined and acrobatic, and extremely entertaining. 

I've tried three times to get this next photo to load vertically, not horizontally. I give up. Just tilt your head onto your right shoulder and pretend. 
I am slowly but surely lining the borders in the back yard with rocks. A new cul-de-sac is being developed as part of our neighborhood, in what has been part of a horse farm for as long as I can remember. I wish some things could stay the same. Anyway, that abused and savaged piece of farm field is ripe for rock hunting, and My Hero and I armed ourselves with a shovel and the wagon and went hunting. I was able to fill in one section and have 3 more areas I'd like to cover. Don't worry, I won't line the entire back yard! 


As I am writing this and uploading photos, I realize that our backyard is a reflection on the new chapter in our lives. We've taken the swing set down.  17 and 21 year olds don't climb into tree forts, slide down curvy slides and see how high they can swing. Our goal was to raise adults, not children and letting the swing set go is expected. However,  I can't help but wonder if Maybe the world would be happier if we never stopped swinging.  

As I contemplated the demise of the swing set, I began to plot a use for some of the lumber. Up 'til now, my clothesline has been a retractable line that extended from the house to the swing set. Might we build a real clothesline with some of the salvaged swing set? 

Yes!
 I now have 4 lines for pegging up my wash. I think I will actually be able to dry all the sheets and pillowcases and maybe even a blanket at the same time. 

And lastly, because we are talking flowers and marigolds- here is the shawl I knitted using the handspun, marigold dyed yarn. Elle decided to tiptoe through the tulips squat in the marigolds for this photo shoot. I used Orlane's Textured Shawl Recipe, and knit up every single centimeter of the yarn. (I had to go to the tiny bit that was left on a bobbin to finish binding off the last 20 stitches.)

 This came off the needles last night and blocked and dried while I slept. There is something very soothing about knitting and wearing shawls. This one is knit from the top down, so I cast on using the skein with the least amount of yardage and worked my way up in yardage as I worked my way down the shawl. It will be nice wearing this one with its ties to summer marigold flowers.

Enjoy the sunshine and blue sky. My sheets are going to smell heavenly!
Love,
Kim


Tuesday, May 5, 2015

Spinning


Dear Mom,
My visit to The Fiber Event in Greencastle a few weeks ago inspired motivated me to get spinning. I have 3 rather large boxes of roving to get through and have more coming once the angora from Duncan is processed.
I finally finished spinning the wool I dyed with marigolds last summer. It's not that there was so much of it to spin; I just needed to buckle down and spend time spinning it.
There should be enough to knit a shawl. I ply-ed it to take advantage of the gradient shades.

The next bundle of roving I pulled from the stash was one that I dyed in the workshop I took at Tabby Tree a long time ago….

 Oh my. I see from THIS POST that I took that workshop 5 years ago!
Oh well. Five years ago I would not have been able to spin that roving into something this lovely. I think this just might be the prettiest yarn I've spun so far.


I am so enamored with it that I am taking its picture wherever I think it will look prettiest. It is only the fear of having to explain myself to a neighbor that has stopped me from draping the yarn in the lilac bushes.
Love,
Kim

Monday, November 17, 2014

Marigolds, Merino, and Mohair

Dear Mom,
Before I cleaned up the garden, and inspired by these books, I harvested a gallon sun tea jar's worth of marigold flowers with the hopes of dying some of that lovely Merino/Mohair roving I have.

 I must confess that it took me awhile to get over some of the weights and measures and science and decide to see what happened with what I have. I pre-mordanted the fiber in Alum and prepared the dye stock by simmering the marigolds in a huge stock pot for about an hour. It was still warm outside and my windows were open. Although I did not find the smell offensive, I don't think I'd want to do this with the windows closed. In other words, this is a fair weather process.


After I strained out the plant material I gently put the roving into the steamy marigold broth. I allowed it to steep for about 45 minutes. To avoid handling the fiber, I placed it into a large mesh zippered laundry bag. I am glad I did it this way because I was able to pull the fiber out and save the broth. It took several rinses before the fiber was clear of residual dye. I spun the bag of fiber in the front loader and laid it out to finish drying.

I was very pleased with the result!


 A few days later I decided to play things fast and loose (for me) and put another batch of pre-mordanted fiber into the leftover, re-heated marigold broth. Another good result- a little paler in color, but still very pretty.

 Then I really got carried away and reused the alum mordant bath on two small bundles of roving and put the twice used marigold broth into two crockpots. I let the fiber "cook" all night.  I am sure there are good reasons (probably many of them) for these crockpots to end up at the Goodwill where I purchased them. I discovered one of the reasons for one of those crockpots had to be that it gets way too hot. When I checked on my little experiments the next morning, one of the pots was sputtering and boiling over! Yikes! I was afraid I'd find a felted blob of wool inside. Both pots yielded more pretty color, and the overheated fiber has an interesting bronze color.
Crock pot 1- "normal" heat

super hot crock pot
This next photo has all 4 rovings lined up from 1st batch on the left to the super heated batch on the right.
I've started spinning that first ball. I have a bright red felted wool coat and a navy pea coat and think this yellow wool will make a pretty scarf or maybe even a scarf and hat that will look nice with both.
In spinning this blend of fibers, it is a treat to see the shimmery mohair bits with the merino and how they've each taken up the dye differently but very subtly.
You should be able to see the slight differences in this next photo. Some of the shades are a result of the dye not being consistently absorbed throughout the roving (which I like) and some is the difference in the merino and mohair.
I won't have any more marigolds to play with until next summer. I do have other things on my dye shelf in the garage to play with though!
Love,
Kim